Have you bought moon cakes to celebrate Mid-Autumn Festival yet? I have not but lanterns I have created for my children are ready. Here is a tutorial guide on the one I have created for Calvin.
To do the cut out for decorating the surface, check out the instruction for creating a Polish Gwiazdy. It is similar to doing a cut out for snowflakes. The design of the one I have pasted on my lantern is cut out from a square piece of paper.
Keep folding the square to cut out a triangular shape, circle or a rectangle. You can also fold it at an angle to cut. Open it up to check how it turn out before deciding if you need to do more cut outs.
Monday, August 11, 2008
Wednesday, July 2, 2008
Paper Bag Transformation
The library at Sungai Long Buddhist Society needs book stands for its collection of National Geographic magazines. I decided to create book stands for them since I would like to help the society save some funds.
If you are interested to make your own, I have the instruction on this slide show.
If you are interested to make your own, I have the instruction on this slide show.
Monday, June 16, 2008
Embroidery frame and balloon. What's the connection?
If you have kids at home, you are bound to have some balloons from parties the kids had attended. These may have been given out at shopping complexes during promotions. Once these balloons have deflated what can you do with them?
First go and look around for some embroidery frames. You most likely have at least one sitting in your store room somewhere from a past hobby phase someone in your family went through.
Got that? Now sit down and watch Hillar Bergman creates a drum out of them with the help of some clamps.
Drum away abandoned materials.
Tuesday, June 10, 2008
Table Chic from Trash
I have been watching David Tutera on Party Planner and...
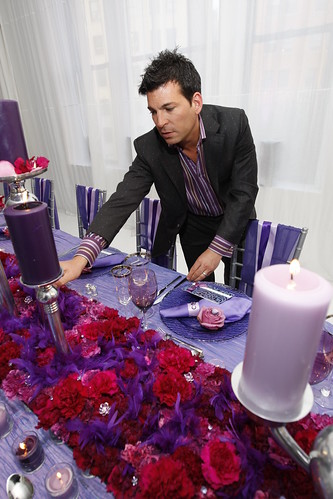
...he has inspired me to create a flora centre piece for dining table.

All you need to salvage from your bin are:
1) 4 Plastic Bags in one or two colours to from stamens
2) 4 Plastic Bags in a larger size to from petals of flower
3) 2 Plastic Bags in smaller size in 2 different shades of colour
4) 7 small batteries to to add weight to piece
5) 2 rubber bands
Equipment Needed
1) Scissors
Here is the instruction.
Like it? Then make many of them in different shades to decorate your dinning table.
I have been inspired by David. Have I inspired you?
Tuesday, January 1, 2008
A reminder that words can kill.
So, you like my write up about props and would like to create your own?
These are the material and tools you need:
1) Scissors
2) Rubberbands
3) Magic Pen for writing and colouring
4) Cardboard from a box
Method
1) Create the handle and write the word "Handle" on it. The handle can be in any style you like. I have created mine by drawing circles that overlap one another.

2) Reinforce the cardboard by stapling a narrow strip of cardboard to the back of the handle at the tip and mid section of the handle.

3) Create another piece to form the "T" of the handle. Write the words "With Care" on this piece.

4) Create the sharp end of the sword and write the word "Swords" in the direction as shown in the picture.

5) Staple the handle together as shown below.

This is how it will look from the front.

6) Place the pointed end of the sword on top of the handle, with words facing out.

Turn it around to check to make sure that the handle covers the first letter, "S", of the word "SWORDS".

Use the rubberbands to hold them together.

When you turn the pointed end the other way and hold it in place with the rubberbands. This is what you will get...

... a picture like this when you cannot afford a serious actor.
Subscribe to:
Posts (Atom)

